


Description
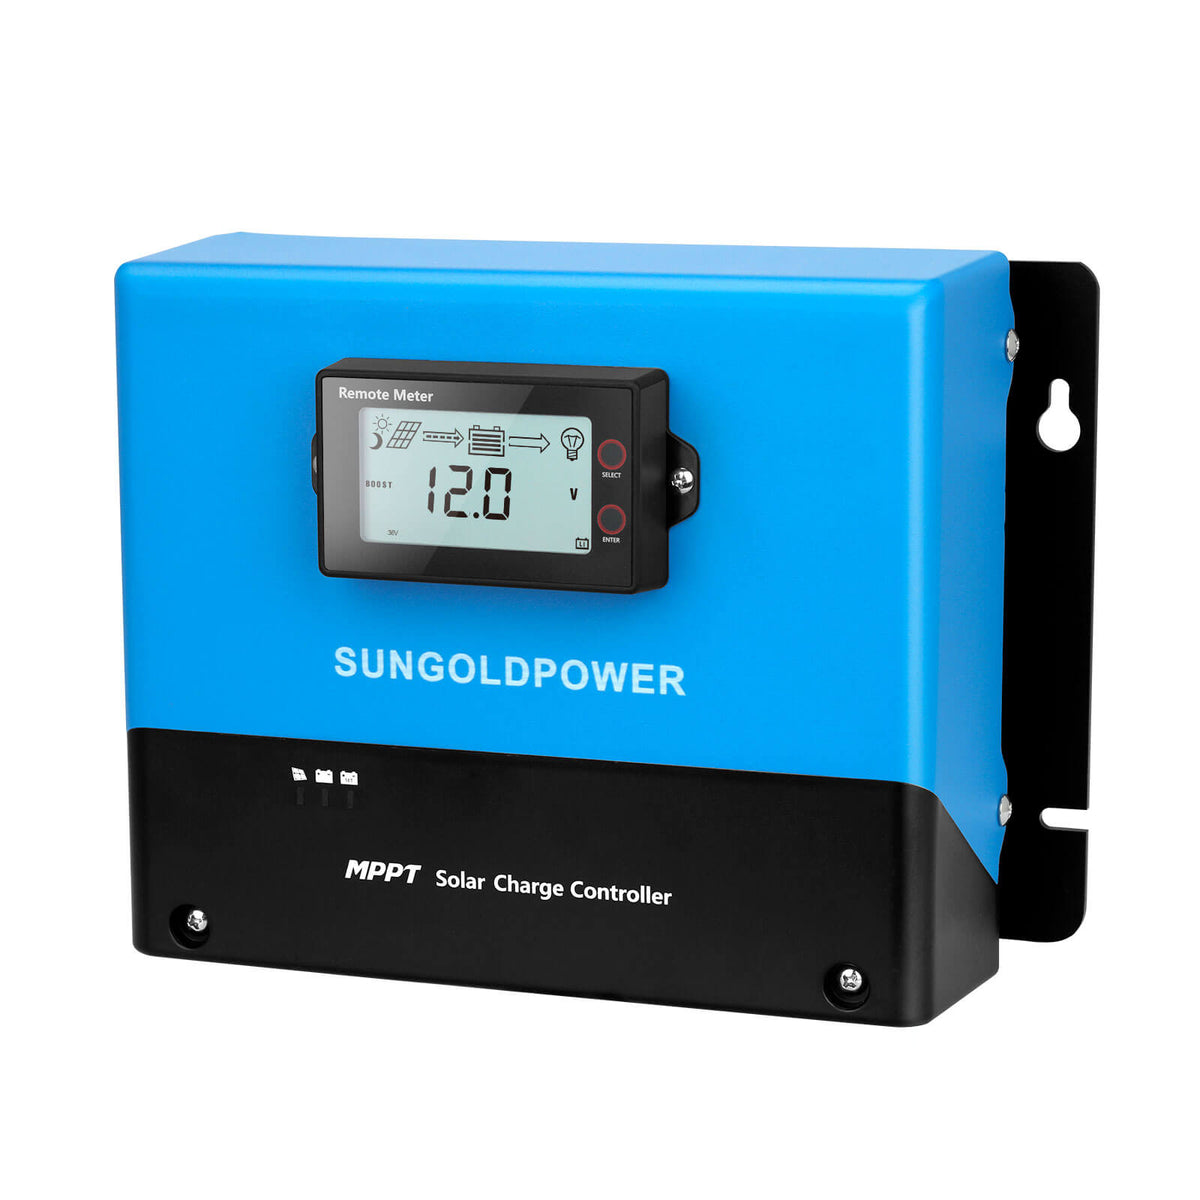
100 Amp MPPT Solar Charge Controller


The 100 Amp MPPT Solar Charge Controller from SunGoldPower is designed to manage solar panel charging and help maximize energy transfer to compatible battery banks. Using advanced PowerCatcher Maximum Power Point Tracking (MPPT) technology, it continuously adjusts to changing solar conditions to capture available power efficiently and support reliable charging in off-grid photovoltaic systems.
With automatic detection of 12V, 24V, 36V, and 48V battery systems, the controller provides flexibility for different solar power installations. It supports multiple battery types, including lithium, sealed lead-acid, AGM, and customizable battery configurations.
The controller also features an integrated LCD display, Bluetooth monitoring, adjustable charging parameters, and multiple electrical protection functions. Its parallel operation capability allows compatible installations to expand charging capacity beyond a single controller.
Available product options include Brand New and Refurbished.
Key Features


Specifications
- Rated Charging Current: 100A
- Supported System Voltages: 12V / 24V / 36V / 48V
- Battery Voltage Range: 9V–64V
- Maximum PV Open-Circuit Voltage: 250V
- Maximum PV Input Current: 70A
- Maximum PV Short-Circuit Current: 70A
- Maximum Power Point Voltage Range: Battery voltage +2V to 180V
- Adjustable Charging Current: 0–100A
- Maximum Output Overcurrent Protection: 100A
- Maximum Output Power: 5280W
- Recommended Solar Panel Power at 12V: 1320W
- Recommended Solar Panel Power at 24V: 2640W
- Recommended Solar Panel Power at 36V: 3960W
- Recommended Solar Panel Power at 48V: 5280W
- MPPT Tracking Efficiency: Up to 99.9%
- Charging Conversion Efficiency: Up to 98%
- No-Load Power Consumption: 0.54W
- Communication Interfaces: TTL / Isolated RS485
- Bluetooth: Built-in Bluetooth 4.0 BLE
- Temperature Compensation Coefficient: -3mV/°C/2V (default, adjustable for lead-acid batteries)
- Lithium Battery Temperature Compensation: No temperature compensation
- Programmable Relay Output: DPST 10A/250VAC; 10A/30VDC
- Operating Temperature: -35°C to +65°C
- Temperature Derating Threshold: 40°C
- Maximum Operating Altitude: ≤3000 m
- Protection Rating: IP32
- Net Weight: 5.7 kg
- Conventional Controller Dimensions: 314 × 227 × 121 mm
- MC4 Controller Dimensions: 314 × 259 × 121 mm
- Installation Dimensions: 228 × 171 mm
- Mounting Hole Diameter: 8 mm
- Maximum PV Terminal Wire Size: 18 mm² / 4 AWG
- Battery Wire Size: 25 mm² / 2 AWG

How to Use
Important: The controller operates at potentially hazardous electrical voltages. Installation and electrical work should be performed by appropriately trained personnel following the complete user manual and applicable electrical requirements.
Step 1: Select a Suitable Installation Location
-
Choose an indoor installation location.
-
Keep the controller away from direct sunlight, high temperatures, and possible water exposure.
-
Ensure the installation area provides adequate ventilation.
-
Leave at least 150 mm of clearance above and below the controller for heat dissipation.
-
Avoid enclosed spaces without sufficient cooling.
Step 2: Mount the Controller
-
Identify the controller's mounting positions.
-
Mark the four mounting holes.
-
Drill holes at the marked positions using suitable mounting hardware.
-
Secure the upper mounting screws.
-
Align the controller with the upper screws and hang it in position.
-
Install and tighten the lower mounting screws.
-
Confirm that the controller is securely mounted.
Step 3: Prepare the Electrical Connections
Before wiring:
-
Disconnect the photovoltaic array.
-
Open the applicable battery fuse or breaker.
-
Confirm that all relevant circuits are de-energized.
-
Prepare suitable cables according to the controller's rated current.
-
Verify positive and negative terminal identification.
-
Use appropriate insulated tools and protective equipment.
The manual recommends suitable protective fuses or breakers at the photovoltaic array and battery connections.
Step 4: Connect the Battery
The battery must be connected before the solar panel array.
-
Confirm that the battery fuse or breaker remains open.
-
Connect the battery cables to the designated controller terminals.
-
Follow the specified positive and negative connection sequence.
-
Check the connections for correct polarity.
-
Secure the terminal connections.
-
Confirm that no wiring is loose.
Warning: Reversing the battery polarity can cause irreversible controller damage. The controller does not provide battery reverse-polarity wiring protection.
Step 5: Connect the Solar Panel Array
-
Confirm that the photovoltaic array remains electrically isolated.
-
Identify the positive and negative photovoltaic terminals.
-
Connect the solar panel wiring according to the controller's wiring diagram.
-
Check the wiring for correct polarity.
-
Confirm that the photovoltaic input remains within the controller's electrical ratings.
-
Secure all connections.
Step 6: Verify the Wiring
Before energizing the system:
-
Inspect all battery connections.
-
Inspect all photovoltaic connections.
-
Confirm correct terminal polarity.
-
Verify that all electrical connections are secure.
-
Check grounding and applicable protection devices.
Step 7: Activate the Battery Connection
-
Close the battery fuse or breaker.
-
Check the controller's LED indicator.
-
Confirm that the controller powers on normally.
If the indicator does not illuminate, immediately disconnect the battery circuit and inspect the wiring.
Step 8: Activate Solar Charging
-
After confirming that the battery connection is operating normally, connect the photovoltaic array.
-
Confirm that sufficient sunlight is available.
-
Observe the charging indicator.
-
Verify that the controller begins charging.
The charging indicator should illuminate or flash during normal solar charging operation.
Step 9: Configure the Battery Type
-
Access the controller's battery type settings.
-
Select the appropriate supported battery type.
-
Review the charging parameters.
-
Adjust configurable settings only according to the battery manufacturer's requirements.
-
Confirm that the selected charging settings are appropriate for the connected battery system.
Supported settings include lithium, sealed lead-acid, AGM, and customized battery configurations.
Step 10: Monitor the Controller
Use the LCD display to access available information, including:
-
Charging status
-
Battery information
-
Operating parameters
-
System settings
-
Error codes
The controller also supports compatible mobile application monitoring through Bluetooth.
Step 11: Connect Bluetooth Monitoring
-
Install the applicable Solar APP on a compatible mobile device.
-
Enable Bluetooth on the mobile device.
-
Open the application.
-
Connect to the controller using the application's supported connection procedure.
-
View available charging and operating information.
Step 12: Perform Regular Maintenance
-
Disconnect all controller power before performing maintenance.
-
Inspect the controller's ventilation areas.
-
Remove dust or debris that could obstruct cooling.
-
Inspect electrical terminals for corrosion, overheating, or discoloration.
-
Examine wires for damaged insulation or loose connections.
-
Check the controller for unusual operating conditions or error messages.
-
Have damaged components inspected and serviced by qualified personnel.
Do not disassemble or attempt unauthorized internal repairs.
Compatibility
- Battery System Voltages: 12V, 24V, 36V, and 48V DC systems.
- Supported Battery Types: Lithium batteries, sealed lead-acid batteries, AGM batteries, and compatible custom battery configurations.
- Solar Panel Systems: Designed for compatible photovoltaic arrays operating within the controller's specified voltage, current, and power limits.
- Parallel Controllers: Supports compatible parallel operation for expanded charging capacity.
- Bluetooth Monitoring: Supports monitoring through the applicable Solar APP using Bluetooth 4.0 BLE.
- Communication: Supports RS485, TTL, and compatible Modbus communication applications.
- Off-Grid Solar Systems: Designed for photovoltaic systems that use solar panels and battery storage.
Product Support
Warranty
Warranty & Support
Price Match Guarantee
Payment & Security
Your payment information is processed securely. We do not store credit card details nor have access to your credit card information.